CSS Framework 960.gs

960.gs is strong CSS framework. When I first used this tool I found it quite complicated to understand, but gradually I got know the uses of this nice framework. Here I’ll be sharing my experience on this amazing tool for the beginners.

Download the file nathansmith-960-Grid-System-0d61cf1.zip from 960.gs and extract it. Then go to the copy folder and open the demo.html is your favorite IDE(notepad, textwrangler, netbeans etc) and start editing 😀

If you open the demo.html in your browser you’ll find lots of dummy layouts to choose your own. Find the layout you need, and remove the others. The css code is written in such a great organized way, so that will understand it very soon. I’ll suggest you to start with the uncompressed folder, where you will find the .css file more understandable.

Layouts are organized into 3 different ways, container_24(which can be found in a separate .css file), container_12 and container_16. The number after the container stands for the number of usable grids using that certain container. Then, there are grids, grid_1, grid_2, … , grid_16. These are the selectors of the specific fields with specific positions and sizes. alpha and omega are the tools to choose margin positions respectively left and right. prefix and suffix are used for left and right padding. push and pull are used to specify the exact position specifying the pixels into positive and negative.

See sample code comes with demo.html, start editing and make your own constant CSS layouts.
JDBC – Java Database Connectivity

Java Database Connectivity (JDBC), which is a standard Java API for database-independent connectivity between the Java programming language and a wide range of databases.
It has four major parts:

  • Making a connection to a database
  • Creating SQL or MySQL statements
  • Executing that SQL or MySQL queries in the database
  • Viewing and modifying the resulting records

Step 1

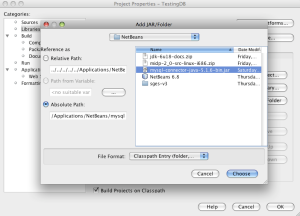
Open a new Java Application –> Right-click on the project –> select Properties. Then from the left menu select libraries.

selecting JAR file
selecting JAR file

Select Add JAR/Folder.

select the mysql-connector-java-5.1.6-bin.jar file. Which can be found in the Netbeans folder. For Mac, it is in /Application/Netbeans/Netbeans 6.8/contents/Resources/ide12/modules/ext/mysql-connector-java-5.1.6-bin.jar

Now are able to use the JDBC in your program frequently 🙂

Step 2

Here, I’ll be talking about connecting to a MySQL database. But it can be used for other cases also.

Selecting a right driver will be another major task.

For ORACLE the driver will be oracle.jdbc.driver.OracleDriver

For DB2 the driver will be COM.ibm.db2.jdbc.net.DB2Driver

For Sybase the driver will becom.sybase.jdbc.SybDriver

import java.sql.*;

Load the driver class using Class.forname(com.sybase.jdbc.SybDriver)

Define the data source for the driver String sourceURL = “jdbc:mysql://URL/database_name”

Create a connection through the DriverManager

Connection databaseConnection = DriverManager.getConnection(sourceURL)

All this should be in a try-catch block.