In the last post, we have installed Riak CS on a single node. For production, a deployment of five or more nodes is required for better performance, reliability. Riak has a default three times data replication mechanism and in smaller deployment the replication requirement may not be met properly and also it may compromise the fault-tolerance ability of the cluster. Fewer nodes will have higher workloads.
According to the documentation:
If you have 3 nodes, and require all 3 to replicate, 100% of your nodes will respond to a single request. If you have 5, only 60% need respond.
In this post, we will use 5 nodes to create a Riak cluster for our Eucalyptus setup. Since we will be using Riak CS, we will be installing Riak CS in each node. We will also need a Stanchion server.
Overall, our setup will look like below:
a) 5x Riak nodes
b) 5x Riak CS nodes (one in each Riak node)
c) 1x Stanchion node
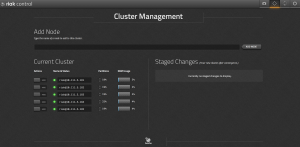
d) 1x Riak Control
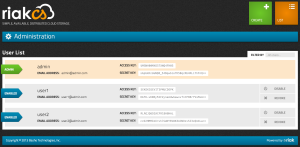
e) 1x Riak CS Control
f) 1x Nginx server for load balancing between the Riak CS nodes
First we will install Riak, Riak CS on all the nodes,
yum install http://yum.basho.com/gpg/basho-release-6-1.noarch.rpm -y
yum install riak riak-cs -y
Configure Riak:
Modify the following lines from /etc/riak/app.config with the host IP address,
{pb, [ {"127.0.0.1", 8087 } ]}

{http, [ {"127.0.0.1", 8098 } ]},
Find the following line from /etc/riak/app.config and replace it with multi backend setup,
from:
{storage_backend, riak_kv_bitcask_backend},
to:
            {add_paths, ["/usr/lib64/riak-cs/lib/riak_cs-1.4.5/ebin"]},
            {storage_backend, riak_cs_kv_multi_backend},
            {multi_backend_prefix_list, [{<<"0b:">>, be_blocks}]},
            {multi_backend_default, be_default},
            {multi_backend, [
              {be_default, riak_kv_eleveldb_backend, [
                {max_open_files, 50},
                {data_root, "/var/lib/riak/leveldb"}
              ]},
              {be_blocks, riak_kv_bitcask_backend, [
                {data_root, "/var/lib/riak/bitcask"}
              ]}
            ]},
And add the following line to riak_core section in the config file,
{default_bucket_props, [{allow_mult, true}]},
Change the following line from /etc/riak/vm.args with host IP address,
-name riak@127.0.0.1
Configure Riak CS:
Modify the following lines from /etc/riak-cs/app.config with the host IP address,
{cs_ip, "127.0.0.1"},

{riak_ip, "127.0.0.1"},

{stanchion_ip, "127.0.0.1"},
We are going to have to create an admin user, modify the following line and set the value to true for now, change it back before going into production,
{anonymous_user_creation, false},
Change the following line from /etc/riak-cs/vm.args with host IP address,
-name riak@127.0.0.1
Follow the same procedure for rest of the nodes.
Configure Stanchion:
Install Stanchion in one of the servers,
yum install stanchion -y
Modify the following lines from /etc/stanchion/app.config with the host IP address,
{stanchion_ip, "127.0.0.1"},

{riak_ip, "127.0.0.1"},
Modify the following lines from /etc/stanchion/vm.args with the host IP address,
-name stanchion@127.0.0.1
Start Riak components on the server where Stanchion is installed:
riak start
riak-cs start
stanchion start
Create admin user:
curl -H 'Content-Type: application/json' \
-X POST http://10.111.5.181:8080/riak-cs/user \
--data '{"email":"admin@admin.com", "name":"admin"}'
From the output save the following two variables,
"key_id":"UMSNH00MXO57XNQ4FH05",
"key_secret":"sApGkHzUaNQ0_54BqwbiofH50qzRb4RLi7hFnQ=="
In production system, you may want to change the anonymous_user_creation settings to false after creating the admin user.
From /etc/riak-cs/app.config and /etc/stanchion/app.config change the following two values with key_id and key_secret,
{admin_key, "admin-key"},
{admin_secret, "admin-secret"},
Restart both riak-cs and stanchion.
Setting up Riak Cluster:
Now we will join all the nodes. Run the following from each node (for this guide, I kept the stanchion node’s IP constant)
riak-admin cluster join riak@<node-ip>
riak-admin cluster plan
riak-admin cluster commit
Activate Riak Control:
Modify the following lines from /etc/riak/app.config with the host IP address,
{https, [{ "127.0.0.1", 8098 }]},
Uncomment the ssl configuration and set file path as appropriate,
{ssl, [
       {certfile, "/etc/riak/cert.pem"},
       {keyfile, "/etc/riak/key.pem"}
     ]},
Follow this guideline to create self-signed certificate,
http://www.akadia.com/services/ssh_test_certificate.html
Set the following to true from riak_control section,
{enabled, false},
and set username/password,
{userlist, [{"user", "pass"}
]},
Login to the following url to access Riak Control web interface,
https://RIAK-NODE-IP:8069/admin

Install and Configure Nginx:
We will use Nginx as a load balancer between the nodes. It can be installed on any node or on an external server as well which can work as a load balancer between the Riak CS nodes.
We will be installing Riak CS Control which seems to be using HTTP 1.1 version (available from Nginx 1.1.4). So, we will be using latest stable version of Nginx on our Nginx server.
yum install http://nginx.org/packages/centos/6/noarch/RPMS/nginx-release-centos-6-0.el6.ngx.noarch.rpm -y
yum install nginx -y
Nginx config file will look like this [source],
upstream riak_cs_host {
  server :8080;
  server :8080;
  server :8080;
  server :8080;
  server :8080;
  }

server {
  listen   80;
  server_name  _;
  access_log  /var/log/nginx/riak_cs.access.log;
  client_max_body_size 0;

location / {
  proxy_set_header Host $http_host;
  proxy_set_header X-Real-IP $remote_addr;
  proxy_redirect off;

  proxy_connect_timeout      90;
  proxy_send_timeout         90;
  proxy_read_timeout         90;
  proxy_buffer_size    128k;
  proxy_buffers     4 256k;
  proxy_busy_buffers_size 256k;
  proxy_temp_file_write_size 256k;
  proxy_http_version    1.1;

  proxy_pass http://riak_cs_host;
  }
}
Install and Configure Riak CS Control:
Run the following command to install Riak CS Control,
yum install http://s3.amazonaws.com/downloads.basho.com/riak-cs-control/1.0/1.0.2/rhel/6/riak-cs-control-1.0.2-1.el6.x86_64.rpm -y
Modify the following lines from /etc/riak-cs-control/app.config with the Nginx server’s IP address and proxy,
{cs_proxy_host, "127.0.0.1" },
{cs_proxy_port, 8080 },
Set the admin creds downloaded above in /etc/riak-cs-control/app.config file.

Configure Eucalyptus:
Now as usual, set the Riak CS property to use as Eucalyptus Object Storage Gateway’s (OSG) backend,
Update:
Instead of using Riak CS admin account since it has special admin privileges, we need to create a regular Riak CS account, via Riak CS Control or command line (like above) and use it for Eucalyptus.
euca-modify-property -p objectstorage.s3provider.s3endpoint=NGINX-IP

euca-modify-property -p objectstorage.s3provider.s3accesskey=ACCESS-KEY

euca-modify-property -p objectstorage.s3provider.s3secretkey=SECRET-KEY
Enjoy multi-clustered Riak CS with Eucalyptus!

