Eucalyptus VPC with MidoNet 5.2

Eucalyptus started to support AWS compatible VPC (Virtual Private Cloud) from v4.2 as a new networking mode VPCMIDO. Eucalyptus still supports the EC2 classic networking in EDGE networking mode. Eucalyptus VPC exposes the same AWS VPC APIs to support the existing application that were built for AWS. Eucalyptus uses MidoNet as a backend for VPC and supports both open source MidoNet and Midokura Enterprise MidoNet (MEM). The current Eucalyptus release v4.3 supports MidoNet v1.9 and has gone through a huge improvements in terms of performance and stability from Eucalyptus v4.2.2.

Eucalyptus v4.4 is under heavy development and supports current stable release of MidoNet v5.2!

A basic deployment of MidoNet (v5.2) for Eucalyptus VPC consists of following components:

  1. MidoNet Cluster – installed on Cloud Controller (CLC)
  2. Gateway Node (MidoNet Gateway)
  3. Network State Database (NSDB) – Zookeeper and Cassandra
  4. MidoNet Agents (Midolman) – Cloud Controller (CLC) and Node Controllers (NC)

Steps to install Eucalyptus 4.4 VPC

Even though Eucalyptus 4.4 is still under development, nightly packages are already available here.

Installation of the MidoNet components are pretty straight forward and are well explained in MidoNet documentation.

  • Repository configuration for opensource MidoNet
  • Network State Database installation
  • Install and configure MidoNet Cluster on CLC
    # install packages
    yum install midonet-cluster python-midonetclient
    
    # file: /etc/midonet/midonet.conf
    [zookeeper]
    zookeeper_hosts = 10.111.5.209:2181
  • Run the following command on MidoNet Cluster, configure access to NSDB
    $ cat << EOF | mn-conf set -t default
    zookeeper {
        zookeeper_hosts = "10.111.5.209:2181"
    }
    
    cassandra {
        servers = "10.111.5.209"
    }
    EOF
  • Start midonet-cluster.service
  • Install and configure Midolman on CLC and NCs
    yum install java-1.8.0-openjdk-headless midolman
    
    # file: /etc/midolman/midolman.conf
    [zookeeper]
    zookeeper_hosts = 10.111.5.209:2181
  • Set Midolman resource template
    mn-conf template-set -h local -t default
  • Start midolman.service on all the hosts.
  • Install and configure Eucalyptus with VPCMIDO as networking mode. Eucalyptus 4.4 installation is identical to v4.3.

Create MidoNet Resource for VPC

  • Launch MidoNet CLI on MidoNet Cluster
    midonet-cli -A --midonet-url=http://localhost:8080/midonet-api
  • Create a tunnel-zone with type ‘gre’ (Generic Routing Encapsulation)
    midonet> create tunnel-zone name mido-tz type gre
    tzone0
  • Add hosts e.g CLC, NCs to tunnel-zone. If midolman services are running on the hosts with correct configuration, we should see a list hosts with the following command
    midonet> host list
    host host0 name h-03.qa1.eucalyptus-systems.com alive true addresses 169.254.123.1,fe80:0:0:0:0:11ff:fe00:1101,fe80:0:0:0:0:11ff:fe00:1102,10.111.5.3,fe80:0:0:0:eeb1:d7ff:fe7f:53bc,127.0.0.1,0:0:0:0:0:0:0:1,10.107.105.3,fe80:0:0:0:eeb1:d7ff:fe7f:53bc,fe80:0:0:0:eeb1:d7ff:fe7f:53bc flooding-proxy-weight 1 container-weight 1 container-limit no-limit enforce-container-limit false
    host host1 name g-19-11.qa1.eucalyptus-systems.com alive true addresses fe80:0:0:0:ea9a:8fff:fe74:12ca,fe80:0:0:0:0:11ff:fe00:1102,10.111.1.135,fe80:0:0:0:ea9a:8fff:fe74:12ca,127.0.0.1,0:0:0:0:0:0:0:1,fe80:0:0:0:ea9a:8fff:fe74:12cb,10.113.1.135,fe80:0:0:0:ea9a:8fff:fe74:12ca,10.107.101.135,fe80:0:0:0:0:11ff:fe00:1101,169.254.123.1 flooding-proxy-weight 1 container-weight 1 container-limit no-limit enforce-container-limit false
    host host2 name a-27-r.qa1.eucalyptus-systems.com alive true addresses 127.0.0.1,0:0:0:0:0:0:0:1,fe80:0:0:0:0:11ff:fe00:1102,fe80:0:0:0:ea39:35ff:fec5:7098,10.107.105.209,fe80:0:0:0:ea39:35ff:fec5:7098,fe80:0:0:0:0:11ff:fe00:1101,169.254.123.1,10.111.5.209,fe80:0:0:0:ea39:35ff:fec5:7098 flooding-proxy-weight 1 container-weight 1 container-limit no-limit enforce-container-limit false
    
    # Add the hosts to tunnel zone
    midonet> tunnel-zone list
    tzone tzone0 name mido-tz type gre
    midonet> tunnel-zone tzone0 add member host host0 address 10.111.5.3
    zone tzone0 host host0 address 10.111.5.3
    midonet> tunnel-zone tzone0 add member host host1 address 10.111.1.135
    zone tzone0 host host1 address 10.111.1.135
    midonet> tunnel-zone tzone0 add member host host2 address 10.111.5.209
    zone tzone0 host host2 address 10.111.5.209
  • Set up local ASN for router
    # list router
    midonet> router list
    router router0 name eucart state up asn 0
    midonet> router router0 set asn 65996
    
  • Set BGP Peer (may change in future EUCA-12890)
    midonet> router router0 add bgp-peer asn 65000 address 10.116.133.173
    router0:peer0
  • Set BGP Network
    midonet> router router0 add bgp-network net 10.116.131.0/24
    router0:net0


Install an image using and following command and start running instances with VPC!

python <(curl -sL https://git.io/vXZzY)
or
python <(curl -sL https://raw.githubusercontent.com/eucalyptus/eucalyptus-cookbook/master/faststart/install-emis/install-emis.py)

eucalyptus-selinux: security as a first-class citizen!

Eucalyptus 4.3 development sprint is almost over. SELinux support for Eucalyptus is one of the most exciting features [EUCA-1620] for this release.

Like me, if you haven’t looked into SELinux in a while or it is a new thing to you, here are few tips and tricks that may come handy if things don’t work as expected with SELinux while you are playing with Eucalyptus nightly builds or source code during dev cycles or any other new software while SELinux is set to enforcing on the system.

[It is recommended that you try Eucalyptus 4.3 with SELinux on RHEL 7.x or CentOS 7.x.]

Recently while trying Eucalyptus when SELinux is enabled, I was having issues with starting eucanetd.service, which gave me a chance to look further into Eucalyptus SELinux. It appears that the very latest eucanetd requires to open an UDP port and since SELinux doesn’t yet know about it, it is giving an AVC (Access Vector Cache) error.

In case of situation like this or when a newly installed application fails to run/execute on an SELinux enable box, the first thing to check would be /var/log/audit/audit.log.

In the log I found the following error:

type=AVC msg=audit(1462905888.565:1432): avc: denied { name_bind } for pid=10725 comm="eucanetd" src=63822 
scontext=system_u:system_r:eucalyptus_eucanetd_t:s0 tcontext=system_u:object_r:unreserved_port_t:s0 tclass=udp_socket

type=SYSCALL msg=audit(1462905888.565:1432): arch=c000003e syscall=49 success=no exit=-13 a0=3 a1=7ffef025a010 a2=10 
a3=7ffef0259d90 items=0 ppid=1 pid=10725 auid=4294967295 uid=0 gid=0 euid=0 suid=0 fsuid=0 egid=0 sgid=0 fsgid=0 tty=(none) 
ses=4294967295 comm="eucanetd" exe="/usr/sbin/eucanetd" subj=system_u:system_r:eucalyptus_eucanetd_t:s0 key=(null)

To debug further and start eucanetd.service, I have installed the following tool,
yum install policycoreutils-python

This tools comes with a fantastic command called ‘audit2allow‘, which is useful for both debugging and fixing SELinux policy related issues.

The following command shows the list of SELinux failures with reasons.

audit2allow --why --all

Example:

type=AVC msg=audit(1462905222.124:825): avc:  denied  { name_bind } for  pid=2304 comm="eucanetd" src=63822 scontext=system_u:system_r:eucalyptus_eucanetd_t:s0 tcontext=system_u:object_r:unreserved_port_t:s0 tclass=udp_socket
	Was caused by:
		Missing type enforcement (TE) allow rule.

		You can use audit2allow to generate a loadable module to allow this access.

type=AVC msg=audit(1462905888.565:1432): avc:  denied  { name_bind } for  pid=10725 comm="eucanetd" src=63822 scontext=system_u:system_r:eucalyptus_eucanetd_t:s0 tcontext=system_u:object_r:unreserved_port_t:s0 tclass=udp_socket
	Was caused by:
		Missing type enforcement (TE) allow rule.

		You can use audit2allow to generate a loadable module to allow this access.

Update:
Though the above information is okay, but if you are submitting an issue for a project or asking for SELinux related queries, ausearch is probably a better tool as it combines the SYSCALL and AVC records. Thanks Garrett Holmstrom for the suggestion.

Example:

ausearch -c eucanetd --start recent

Output:

----
time->Tue May 10 17:05:36 2016
type=SYSCALL msg=audit(1462925136.650:5237): arch=c000003e syscall=49 success=no exit=-13 a0=3 a1=7ffe13b6d920 a2=10 
a3=7ffe13b6d6a0 items=0 ppid=1 pid=6069 auid=4294967295 uid=0 gid=0 euid=0 suid=0 fsuid=0 egid=0 sgid=0 fsgid=0 tty=(none) 
ses=4294967295 comm="eucanetd" exe="/usr/sbin/eucanetd" subj=system_u:system_r:eucalyptus_eucanetd_t:s0 key=(null)

type=AVC msg=audit(1462925136.650:5237): avc:  denied  { name_bind } for  pid=6069 comm="eucanetd" src=63822 
scontext=system_u:system_r:eucalyptus_eucanetd_t:s0 tcontext=system_u:object_r:unreserved_port_t:s0 tclass=udp_socket

We can see that eucalyptus_eucanetd type (eucalyptus_eucanetd_t) is missing rules for access. In my case I had quite a few, but the above example gives an idea of how it might look.

Newbie tips:
Run the following command to check security context of a file on a SELinux enabled system,

# ls -ltrhZ /usr/sbin/eucanetd

-rwxr-xr-x. root root system_u:object_r:eucalyptus_eucanetd_exec_t:s0 /usr/sbin/eucanetd

selinux-penguin-new_medium

Now that we’ve identified the problem, solving it is easy. We can use audit2allow to generate modules to install necessary policies. Though, this can be a tedious job sometimes.

To generate missing policies, we can run the following command,

audit2allow -M my_eucanetd_policy < /var/log/audit/audit.log

which will generate an output like below:

******************** IMPORTANT ***********************
To make this policy package active, execute:

semodule -i my_eucanetd_policy.pp

Now load the module as it says in the output.

At this point we try to run the service again, if it’s a new service, it may fails due to not enough permission, e.g a typical service may require following access for a file { getattr read open } in multiple system calls, but generate policy with audit2allow may only detect the last error.

So, if the service fails to start, we check the audit.log, if it’s another AVC denial error, run the command again to generate module, continue this process until there is no AVC denial in the audit.log.

By this time there could be a couple of policy modules generated and we may want have one single policy file to make future usage easier. After merging the policy files, we need to compile and create policy module package and then install module package like above.

For example after merging policies, mine looked like following:
[WARNING]
this post is for debugging and learning purposes only, under no circumstance you should need to apply custom policies for Eucalyptus. Please open an issue if you run across an AVC denial.


module eucanetd_policy 1.0;

require {
        type user_tmp_t;
        type unreserved_port_t;
        type eucalyptus_cloud_t;
        type eucalyptus_eucanetd_t;
        type eucalyptus_var_lib_t;
        type node_t;
        type eucalyptus_var_run_t;
        class capability { dac_read_search dac_override };
        class file { create getattr write open };
        class udp_socket { name_bind node_bind };
        class dir { read write search add_name };
}

#============= eucalyptus_cloud_t ==============
allow eucalyptus_cloud_t self:capability { dac_read_search dac_override };
allow eucalyptus_cloud_t user_tmp_t:dir read;

#============= eucalyptus_eucanetd_t ==============
allow eucalyptus_eucanetd_t eucalyptus_var_lib_t:dir search;
allow eucalyptus_eucanetd_t eucalyptus_var_run_t:dir { write add_name };
allow eucalyptus_eucanetd_t eucalyptus_var_run_t:file { create getattr write open };

allow eucalyptus_eucanetd_t node_t:udp_socket node_bind;
allow eucalyptus_eucanetd_t unreserved_port_t:udp_socket name_bind;

Update:
If planning to merge to another selinux module, the following command could be provide outputs precisely, thanks Tony Beckham for the suggestion.

ausearch --start recent --success no | audit2allow

After merging all the policies generated by audit2allow, it needs to be compiled and then packaged to be installed as a module.

# compile policy
checkmodule -M -m eucanetd_policy.te -o eucanetd_policy.mod

# create module package
semodule_package -m eucanetd_policy.mod -o eucanetd_policy.pp

# install module
semodule -i eucanetd_policy.pp

By following the above steps, typically we should be able to avoid problems like AVC denials.

The source for eucalyptus-selinux: https://github.com/eucalyptus/eucalyptus-selinux
Report for Eucalyptus related issues: https://eucalyptus.atlassian.net

Clustered Riak CS with Eucalyptus Object Storage Gateway

In the last post, we have installed Riak CS on a single node. For production, a deployment of five or more nodes is required for better performance, reliability. Riak has a default three times data replication mechanism and in smaller deployment the replication requirement may not be met properly and also it may compromise the fault-tolerance ability of the cluster. Fewer nodes will have higher workloads.

According to the documentation:

If you have 3 nodes, and require all 3 to replicate, 100% of your nodes will respond to a single request. If you have 5, only 60% need respond.

In this post, we will use 5 nodes to create a Riak cluster for our Eucalyptus setup. Since we will be using Riak CS, we will be installing Riak CS in each node. We will also need a Stanchion server.

Overall, our setup will look like below:

a) 5x Riak nodes
b) 5x Riak CS nodes (one in each Riak node)
c) 1x Stanchion node
d) 1x Riak Control
e) 1x Riak CS Control
f) 1x Nginx server for load balancing between the Riak CS nodes

First we will install Riak, Riak CS on all the nodes,

yum install http://yum.basho.com/gpg/basho-release-6-1.noarch.rpm -y
yum install riak riak-cs -y

Configure Riak:

Modify the following lines from /etc/riak/app.config with the host IP address,

{pb, [ {"127.0.0.1", 8087 } ]}

{http, [ {"127.0.0.1", 8098 } ]},

Find the following line from /etc/riak/app.config and replace it with multi backend setup,

from:

{storage_backend, riak_kv_bitcask_backend},

to:

            {add_paths, ["/usr/lib64/riak-cs/lib/riak_cs-1.4.5/ebin"]},
            {storage_backend, riak_cs_kv_multi_backend},
            {multi_backend_prefix_list, [{<<"0b:">>, be_blocks}]},
            {multi_backend_default, be_default},
            {multi_backend, [
              {be_default, riak_kv_eleveldb_backend, [
                {max_open_files, 50},
                {data_root, "/var/lib/riak/leveldb"}
              ]},
              {be_blocks, riak_kv_bitcask_backend, [
                {data_root, "/var/lib/riak/bitcask"}
              ]}
            ]},

And add the following line to riak_core section in the config file,

{default_bucket_props, [{allow_mult, true}]},

Change the following line from /etc/riak/vm.args with host IP address,

-name riak@127.0.0.1

Configure Riak CS:

Modify the following lines from /etc/riak-cs/app.config with the host IP address,

{cs_ip, "127.0.0.1"},

{riak_ip, "127.0.0.1"},

{stanchion_ip, "127.0.0.1"},

We are going to have to create an admin user, modify the following line and set the value to true for now, change it back before going into production,

{anonymous_user_creation, false},

Change the following line from /etc/riak-cs/vm.args with host IP address,

-name riak@127.0.0.1

Follow the same procedure for rest of the nodes.

Configure Stanchion:

Install Stanchion in one of the servers,

yum install stanchion -y

Modify the following lines from /etc/stanchion/app.config with the host IP address,

{stanchion_ip, "127.0.0.1"},

{riak_ip, "127.0.0.1"},

Modify the following lines from /etc/stanchion/vm.args with the host IP address,

-name stanchion@127.0.0.1

Start Riak components on the server where Stanchion is installed:

riak start
riak-cs start
stanchion start

Create admin user:

curl -H 'Content-Type: application/json' \
-X POST http://10.111.5.181:8080/riak-cs/user \
--data '{"email":"admin@admin.com", "name":"admin"}'

From the output save the following two variables,

"key_id":"UMSNH00MXO57XNQ4FH05",
"key_secret":"sApGkHzUaNQ0_54BqwbiofH50qzRb4RLi7hFnQ=="

In production system, you may want to change the anonymous_user_creation settings to false after creating the admin user.

From /etc/riak-cs/app.config and /etc/stanchion/app.config change the following two values with key_id and key_secret,

{admin_key, "admin-key"},
{admin_secret, "admin-secret"},

Restart both riak-cs and stanchion.

Setting up Riak Cluster:

Now we will join all the nodes. Run the following from each node (for this guide, I kept the stanchion node’s IP constant)

riak-admin cluster join riak@<node-ip>
riak-admin cluster plan
riak-admin cluster commit

Activate Riak Control:

Modify the following lines from /etc/riak/app.config with the host IP address,

{https, [{ "127.0.0.1", 8098 }]},

Uncomment the ssl configuration and set file path as appropriate,

{ssl, [
       {certfile, "/etc/riak/cert.pem"},
       {keyfile, "/etc/riak/key.pem"}
     ]},

Follow this guideline to create self-signed certificate,
http://www.akadia.com/services/ssh_test_certificate.html

Set the following to true from riak_control section,

{enabled, false},

and set username/password,

{userlist, [{"user", "pass"}
]},

Login to the following url to access Riak Control web interface,

https://RIAK-NODE-IP:8069/admin

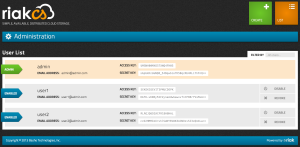
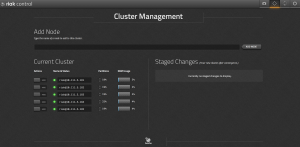
Riak Control
Riak Control

Install and Configure Nginx:

We will use Nginx as a load balancer between the nodes. It can be installed on any node or on an external server as well which can work as a load balancer between the Riak CS nodes.

We will be installing Riak CS Control which seems to be using HTTP 1.1 version (available from Nginx 1.1.4). So, we will be using latest stable version of Nginx on our Nginx server.

yum install http://nginx.org/packages/centos/6/noarch/RPMS/nginx-release-centos-6-0.el6.ngx.noarch.rpm -y
yum install nginx -y

Nginx config file will look like this [source],

upstream riak_cs_host {
  server :8080;
  server :8080;
  server :8080;
  server :8080;
  server :8080;
  }

server {
  listen   80;
  server_name  _;
  access_log  /var/log/nginx/riak_cs.access.log;
  client_max_body_size 0;

location / {
  proxy_set_header Host $http_host;
  proxy_set_header X-Real-IP $remote_addr;
  proxy_redirect off;

  proxy_connect_timeout      90;
  proxy_send_timeout         90;
  proxy_read_timeout         90;
  proxy_buffer_size    128k;
  proxy_buffers     4 256k;
  proxy_busy_buffers_size 256k;
  proxy_temp_file_write_size 256k;
  proxy_http_version    1.1;

  proxy_pass http://riak_cs_host;
  }
}

Install and Configure Riak CS Control:

Run the following command to install Riak CS Control,

yum install http://s3.amazonaws.com/downloads.basho.com/riak-cs-control/1.0/1.0.2/rhel/6/riak-cs-control-1.0.2-1.el6.x86_64.rpm -y

Modify the following lines from /etc/riak-cs-control/app.config with the Nginx server’s IP address and proxy,

{cs_proxy_host, "127.0.0.1" },
{cs_proxy_port, 8080 },

Set the admin creds downloaded above in /etc/riak-cs-control/app.config file.

Riak CS Control
Riak CS Control

Configure Eucalyptus:

Now as usual, set the Riak CS property to use as Eucalyptus Object Storage Gateway’s (OSG) backend,

Update:

Instead of using Riak CS admin account since it has special admin privileges, we need to create a regular Riak CS account, via Riak CS Control or command line (like above) and use it for Eucalyptus.

euca-modify-property -p objectstorage.s3provider.s3endpoint=NGINX-IP

euca-modify-property -p objectstorage.s3provider.s3accesskey=ACCESS-KEY

euca-modify-property -p objectstorage.s3provider.s3secretkey=SECRET-KEY

Enjoy multi-clustered Riak CS with Eucalyptus!

Eucalyptus manual installation

Well, Eucalyptus does not come with Ubuntu any more from version 11.10. Why? Indeed there is no reason, all we can say, this the benefit of being open, you are free to make your own choice 🙂

Anyway, but that doesn’t mean Eucalyptus cannot be used with ubuntu anymore, that’s absurd, isn’t it 😛

Installation detail: Eucalyptus ver. 2.0.2, Ubuntu 11.10, Two physical machines (one with two NICs)

First we are going to setup Cluster Controller (CC). Storage Controller (SC), Cloud Controller and Walrus also going to live in the same box.

sudo apt-get install eucalyptus-cloud eucalyptus-cc eucalyptus-walrus eucalyptus-sc

now we need to install and configure ntp (Network Time Protocol) for the time sync between two machines.

sudo apt-get install ntp

we need to modify the ntp.conf for this setup, but this may not be a good idea for large scale installation.

add the following lines to ntp.conf

server 127.127.1.0
fudge 127.127.1.0 stratum 10

and restart the ntp service.

finally it’s time to register cluster, storage controller and walrus.

sudo euca_conf --register-cluster cluster1 192.168.1.2
sudo euca_conf --register-walrus 192.168.1.2
sudo euca_conf --register-sc cluster1 192.168.1.2

For Node controller we need few more packages. To be in the safe side, I installed all the recommended and suggested packages.

sudo apt-get install bridge-utils libcrypt-openssl-random-perl libcrypt-openssl-rsa-perl libcrypt-openssl-x509-perl open-iscsi powernap qemu-kvm vlan aoetools eucalyptus-nc

node has to be configured with a bridge as the primary interface

auto eth0
iface eth0 inet manual

auto br0
iface br0 inet static
address 192.168.1.3

bridge_ports eth0
bridge_fd 9
bridge_hello 2
bridge_maxage 12
bridge_stp off

install and configure ntp by adding the following line

server 192.168.1.2

modify the qemu.conf file to make sure libvirt is configured to run as user “eucalyptus”

sudo vim /etc/libvirt/qemu.conf

search and set: user = “eucalyptus”

modify the libvirt.conf file

unix_sock_group = "libvirtd"
unix_sock_ro_perms = "0777"
unix_sock_rw_perms = "0770"
auth_unix_ro = "none"
auth_unix_rw = "none"

as the modification is done, so now we have to stop and start libvirt for the changes to take place and also we have to make sure the sockets belong to the correct group

sudo /etc/init.d/libvirt-bin stop
sudo /etc/init.d/libvirt-bin start

chown root:libvirtd /var/run/libvirt/libvirt-sock
chown root:libvirtd /var/run/libvirt/libvirt-sock-ro

edit eucalyptus.conf and set private and public interface as br0

at this point the NC setup is done!

now we have to register this node from the CC like we did before

sudo euca_conf --register-nodes 192.168.1.3

and now you have your own private cloud!

tada!!! 😀

The origin of Cloud Computing

Few days ago while I was having a conversation one of my colleagues on Cloud Computing, he suddenly asked me that how cloud was evolved. Well, then I recalled some of discreet information that I looked at before. Whenever, a non-technical person ask me about Cloud, I feel little messy with the info I know. Anyway, the basic question was pretty much same.

What is cloud computing? How cloud computing has been evolved? Who invented cloud computing?

What is cloud computing The answer is almost everywhere on the internet. Wikipedia also has a fantastic definition of cloud computing. Cloud Computing is all about service. In the cloud, everything you are getting or providing has to be as a service. If not, the highest possibility is that you are not dealing with Cloud. So basically the three parts of cloud is IaaS, PaaS and SaaS. The last two terms are pretty much understandable. Perhaps, two simple example is enough to define these two services. When we are talking about PaaS, that means we are talking about something like Google App Engine and when we are talking about SaaS, then we talking about services like Salesforce.com, Google Apps etc.

So here comes the Infrastructure as a Service (IaaS). In a few words, here the vendors or the cloud service providers are outsourcing the hardware over the internet. This internet based computing models are called Cloud Computing.

1960s John McCarthy theorized of an eventual computing outsource model. He wrote that ‘computation may someday be organized as a public utility.’

There is no single term that defines cloud computing. It’s a collection of modern technologies, virtualization, Web Service and Service Oriented Architecture, Web 2.0 and Mashup.

NetCentric tried to trademark the ‘Cloud Computing’ in May 1997, patent serial number 75291765. But for some reason in April 1999 they abandoned it.

In  March 23, 2007 Dell also applied for the patent.

Cloud Computing vs. Cloud Service Though these two sounds similar, but the two terminology have some fundamental differences. In easy words, when the IT specialists are deploying an IT foundation with servers, storage, network, application software and IP networks etc. and making the system ready to provide service to end users, that refers to Cloud Computing. Cloud Service is mostly related to the end users, here the user is getting the services in real time over the internet. Cloud Service mostly deals with pricing, user interface, system interface, APIs etc.

In 1999, Salesforce.com introduced that enterprise application solutions can be provided using websites. Amazon web services came in 2002 and Google Doc in 2006.

Well, it is told, that Microsoft once tried to make the hype back in 2001. They created something called ‘Hailstorm’ and used the phrase ‘cloud’ of computers. It was a matter of surprise that I couldn’t found the product name on wiki. To know more about the fact this article worth a read.

In August 9, 2006 in a Search Engine Strategies Conference, Eric Schmidt pick the word ‘Cloud Computing’. He used it to explain PaaS/SaaS. But it is also told that Eric took control of the term as Amazon was launching EC2 later that same month and which is also known as classic Google FUD.

Security issues There is also a question about the security issues. Reliability, Availability, and Security (RAS) are the three greatest concerns about migrating to the cloud. Reliability is often covered by a service level agreement (SLA).